How to Can Dry Beans Without Soaking (Easy No Soak Method for Beginners)
Ditch the overnight soak and learn how to can dry beans without soaking using this simple, beginner-friendly no-soak method.
This post may contain affiliate links. Please read our disclosure policy.

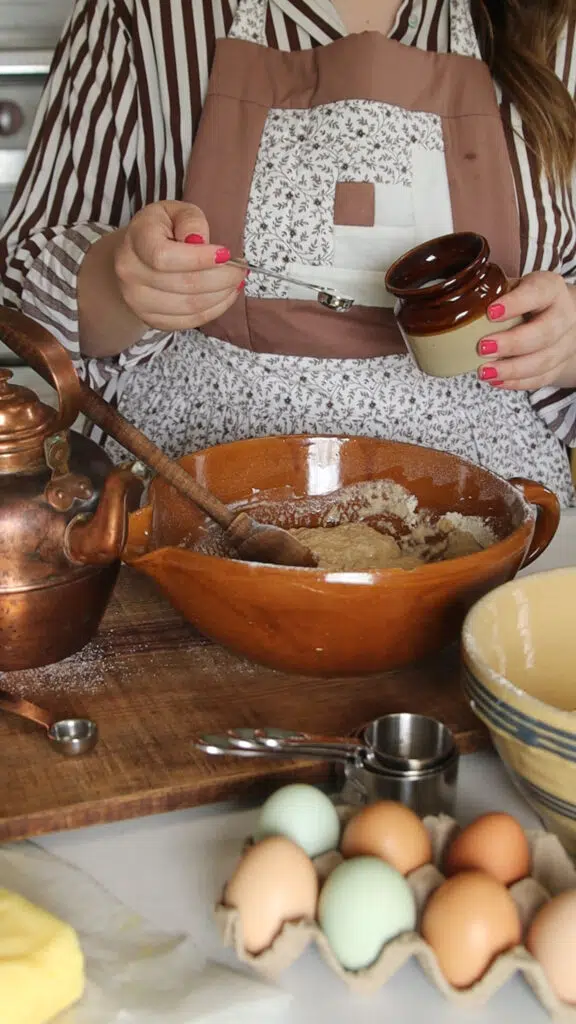
Canning dry beans at home is a smart and budget-friendly way to stock your pantry with protein-packed staples—but soaking them overnight can feel like a hassle. If you’ve ever wished there was a faster way, you’re in luck! This easy no-soak pressure canning method lets you preserve dry beans without pre-soaking, perfect for busy homesteaders or anyone new to pressure canning.
In this guide, I’ll walk you through how to pressure can dry beans without soaking, why this method works, what tools you’ll need, and some important safety notes, especially if you’re new to rebel canning.
If you’re new to canning, be sure to read my guide on pressure canning vs water bath canning so you know which method is safe for preserving different foods.
Is It Safe to Can Dry Beans Without Soaking?
Before we dive in: this method is considered rebel canning, meaning it’s not USDA-approved or included in the National Center for Home Food Preservation guidelines. Traditional methods recommend soaking or fully cooking beans before canning.
That said, many home canners, including myself, safely use this no-soak method when done correctly with proper pressure canning practices. Always do your own research and make informed choices based on what you’re comfortable with.
For more information on rebel canning, I recommend checking out this helpful article.
Why You’ll Love No-Soak Canning
Canning beans from dry without soaking has so many benefits:
- No overnight prep – You can skip the 12-hour soak and get straight to canning.
- Time saver – This method cuts down the total time needed.
- Better texture – Beans tend to hold their shape better and are less mushy.
- More nutrients – Skipping the soak can help retain more vitamins and minerals.
- Simplified workflow – Less prep = less stress.
What Beans Can You Use?
This recipe works with nearly any dry bean variety:
- Pinto beans
- Black beans
- Navy beans
- Great Northern beans
- Kidney beans
- Cannellini beans
- and more!
Equipment Needed for Canning Dry Beans
To safely can dry beans, you’ll need:
- Pressure canner – Required for low-acid foods like beans. Water bath canning won’t work.
- Canning jars – Pint or quart jars (wide mouth or regular).
- New lids and rings – Lids must be unused. Rings can be reused if rust-free.
- Jar lifter, funnel, and lid wand – Makes the process easier and safer.
- Debubbler or butter knife – To remove air pockets.
- Ladle or measuring cup – For pouring hot water.
- Large stockpot – To boil water.
- Strainer – For cleaning the beans.
- White vinegar – For wiping jar rims (not used in the recipe itself).
Ingredients
- Dry beans – Pinto, black, navy, or any other variety
- Canning salt (optional) – 1 tsp per quart or ½ tsp per pint
- Filtered water – Boiling
- White vinegar – For wiping jar rims
How to Can Dry Beans Without Soaking (Step-by-Step)
This easy method walks you through canning beans from dry without soaking, using a pressure canner. Adjust quantities based on your jar size.
Step 1: Prep the Beans
- Measure:
- 1 cup dry beans for each quart jar
- ½ cup dry beans for each pint jar
- Rinse thoroughly in a strainer and remove any debris or damaged beans.


Step 2: Prepare Jars and Lids
- Wash jars, lids, and bands in hot soapy water.
- Simmer lids in a small saucepan of water to keep them sterile.
Step 3: Boil Water
- In a large stockpot, bring filtered water to a boil.
- Set aside when ready.
Step 4: Heat the Pressure Canner
- Add about 3 quarts of water (or to the fill line) in your pressure canner.
- Start heating the water on low heat.
Step 5: Fill the Jars
- Add beans to each jar (1 cup for quarts, ½ cup for pints).
- Optional: Add canning salt.
- Pour boiling water over the beans, leaving 1 inch of headspace.
- Important: Do not overfill the jars with beans—they expand during canning and could cause jars to break.

Step 6: Clean and Seal
- Wipe rims with a vinegar-dampened cloth.
- Add lids and screw bands on finger-tight.
Step 7: Pressure Can
- Load jars into the warm pressure canner.
- Lock the lid and turn heat to high.
- Once a steady stream of steam escapes from the vent, vent for 10 minutes.
- Add the weighted gauge (10 lbs pressure) or adjust for altitude if needed.
- When the gauge rocks steadily:
- Process quarts for 90 minutes
- Process pints for 75 minutes
Step 8: Cool and Remove
- After processing, turn off the heat and let the canner depressurize naturally.
- Wait until the air vent drops.
- Remove weight or regulator and wait 10 more minutes.
- Carefully open the lid away from you and use a jar lifter to transfer jars to a towel-lined counter.
- Let cool for 12–24 hours. Check seals before storing.
Storage Tips
Store sealed jars in a cool, dark place for up to one year for best quality. Label with the date and type of bean.
FAQ’s
How long do home canned beans last?
Home-canned beans are best eaten within 12 months for optimal nutrition and quality, though they may still be safe beyond that.
Can I can dry beans without a pressure canner?
No. Beans must be pressure canned to kill botulism-causing bacteria. Water bath canning is not safe for dry beans.
Is this the same as dry canning pinto beans in an oven?
No, canning dry beans in the oven is extremely different than this method. If you use either of these methods you will be rebel canning dry beans. When you dry can in the oven, you kill bacteria with the heat. There is no liquid added to the beans so they are not getting cooked. When the oven method is finished you are left with sealed uncooked beans.
Is this the same as dry canning beans in the oven?
No, oven canning is a separate process (also not USDA-approved). The method here involves wet pack pressure canning, where beans cook in boiling water during processing.
Can I add meat or flavorings to the jars?
Yes! You can add cooked ham, bacon, onions, or seasoning, but be sure to adjust processing times and follow safe canning practices.
What’s the difference between canning and cooking beans?
Cooking beans makes them ready to eat immediately. Canning beans makes them shelf-stable and ready to use later, straight from the jar.
If you’re new to pressure canning, canning dry beans without soaking is a great beginner project. It’s fast, practical, and gives you jars of ready-to-use beans for soups, stews, and quick weeknight meals.
With just a few basic supplies and a little prep, you’ll have home-canned beans on the shelf in no time, and no more last-minute soaking!
More Canning Posts You’ll Love:
- How to Can Homemade Pasta Sauce with Fresh Tomatoes
- Homemade Canned Pizza Sauce
- How to Pressure Can Potatoes at Home
If you have any questions or comments feel free to leave them below.
Shop Post

Save Pin For Later


I used this method yesterday but added 2\3 C of dry beans to pint jars with 1 inch headspace. The jars are full but the beans on the top look dry and still kind of hard. Can I save my work by opening them all, taking some beans out, adding more water and reprocessing them?
In pint jars you should only add 1/2 cup of dry beans to allow for expansion and to avoid dry beans ontop. I would not recommend opening and then recanning them it will cause the beans to get mushy after so much cooking. I would keep the jars as is and as long as they sealed properly and you canned them for the proper time and poundage I would just discard the hard beans from the jars when I go to use them.