How to Make Raw Milk Cheddar Cheese with Clabber
Create a rich, flavorful cheddar cheese right at home using raw milk and natural clabber no store bought cultures needed. This traditional method brings old fashioned cheesemaking back to your kitchen, perfect for homesteaders and those focused on real food.

This post may contain affiliate links. Please read our disclosure policy.
Making cheddar cheese at home doesn’t have to be complicated especially when you use raw milk and clabber. This traditional method of cheese making skips commercial cultures and relies on simple, natural ingredients to create a rich, flavorful cheese. In this post, I’ll show you how to make raw milk cheddar cheese with clabber step by step, just like it was done generations ago.
What is Clabber and Why Use It?
Clabber is raw milk that has naturally soured and thickened at room temperature. Unlike spoiled pasteurized milk, clabber is alive with beneficial bacteria that develop when raw milk is left undisturbed in a warm environment. It has a sweet cheese like aroma, a yogurt-like consistency, and serves as a traditional, homemade alternative to commercial starter cultures.
So why use clabber in cheesemaking?
Because it’s a natural mesophilic and thermophilic culture, clabber helps acidify the milk and kickstarts the fermentation process essential to making cheese. It not only adds depth and complexity to the flavor of your cheddar, but it also preserves the old-fashioned art of using what you have on hand – just raw milk, time, and patience.
For those looking to make cheese the traditional way, clabber is a simple and effective way to culture your milk without needing anything from the store.
Equipment You’ll Need
- Large stockpot
- Cheese press
- Thermometer
- Knife
- Cheesecloth
- Cheese mold
- Salt brine
Ingredients
- Raw milk
- Animal rennet
- Clabber
How to Make Raw Milk Cheddar Cheese with Clabber – Step-by-Step
Before you start, make sure your clabber is fully ripened and your equipment is clean and ready. This process takes several hours, plus aging time but it’s well worth the wait!
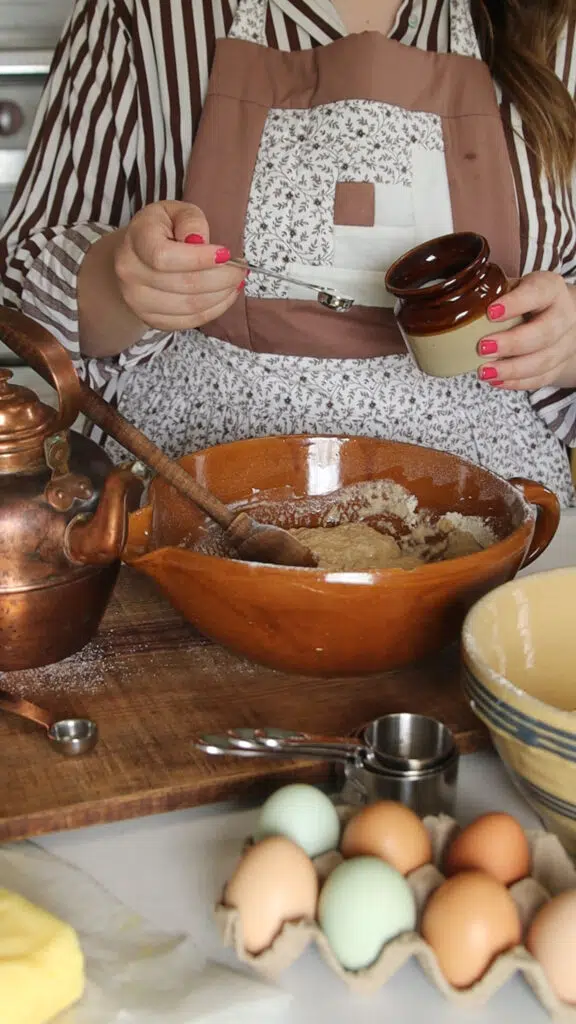
Step 1: Warm the Milk and Add Clabber
Pour the raw milk into a large pot and slowly warm it to 88°F over low heat. Stir gently, frequently, to avoid scorching.
Once it reaches 88°F, turn off the heat, and stir in the clabber. If adding calcium chloride, add it now. Mix in an up and down motion for 30 seconds, cover, and let the milk ripen for 40 minutes. This allows the clabber culture to begin acidifying the milk naturally.
Step 2: Add Rennet and Let Set
Dilute the rennet in 1/4 cup of cool, non-chlorinated water. Add water and rennet to milk. Gently stir it into the milk in an up and down motion for 30 seconds. Cover and let it sit undisturbed for 45–60 minutes, or until the curd gives a clean break.
Step 3: Cut the Curd
Once you get a clean break, cut the curd into 1/2-inch cubes using a long knife. Let the curds rest for 5–10 minutes to firm up.
Step 4: Cook the Curds
Slowly heat the curds to 100°F over 45 minutes, stirring gently. This firms the curds and allows the whey to separate. After 45 minutes turn off heat. Cover pot and allow the curds to rest 45 minutes.

Step 5: Drain the Whey
Pour off most of the whey, leaving about 2 inches of whey in the bottom of the pot with the curds. Transfer the curds to a fine mesh strainer or colander lined with cheesecloth.
Step 6: Cheddar the Curds
Over low heat begin heating the whey. Place the fine mesh strainer over the pot. (Put the pot lid on if you can.) Allow the curds to steam for 10 minutes. Flip the curd mass over and allow the other side to steam for 10 minutes. Using a knife cut the curd mass into 4 equal pieces. Flip the curds so the cut side is face down. Steam for 10 minutes. Flip the curds to the last non steamed side and allow to steam for 10 minutes.


Step 7: Mill and Salt the Curds
Cut the curd mass into 1 inch chunks (“milling”) and mix in the salt evenly. This step adds flavor and helps draw out moisture.

Step 8: Sanitize and Press the Cheese
Using boiling hot water sanitize the cheese mold, cheese cloth, and press. Pack the salted curds into a cheese mold lined with clean cheesecloth. Press on firm pressure for 30 minutes. Unwrap, flip, and press again on firm pressure, gradually increasing pressure over 12 hours.


Step 9: Air Dry and Age
Remove the cheese from the mold and let it air dry on drying rack covered with a tea towel at room temperature for 2–5 days, turning daily, until a dry rind forms.

Then vacuum seal the cheese and age in a cool, humid space (ideally 50–55°F) for at least 3 months, but preferably longer. The flavor will deepen with age!
Watch the full step-by-step cheddar cheese tutorial here:
Troubleshooting Homemade Raw Milk Cheddar Cheese with Clabber
My curd didn’t set. What went wrong?
Possible causes:
- Clabber wasn’t active or acidic enough
- Rennet was old, inactive, or improperly stored
- Milk temperature was too high or too low
- Fix: Check that your clabber is tangy and thick, and always use a thermometer when heating your milk.
My curds are too soft or mushy.
Possible causes:
- Not enough rennet
- Over-acidified milk (clabber too strong or added too much)
- Didn’t allow curds to cook long enough
- Fix: Next time, reduce the amount of clabber or let it culture for a shorter period. Monitor your cook time and temperature closely.
My cheese is too dry or crumbly.
Possible causes:
- Curds overcooked or over-stirred
- Pressed with too much weight too soon
- Aged too quickly in a dry environment
- Fix: Fix: Press firm and gradually increase pressure. Cheddar is very hard to press after going through the cheddaring process.
FAQs
Can I use pasteurized milk instead of raw milk?
Not for this method. Pasteurized milk won’t naturally clabber, and it lacks the living enzymes and bacteria essential for traditional cheese fermentation. Stick with raw milk for the best results.
How do I know when my clabber is ready?
Your clabber is ready when it’s thickened, tangy, and separates cleanly when scooped. It usually takes 24–48 hours at room temperature, depending on your kitchen environment.
Is clabber safe to eat or use in cheese?
Yes, if made with fresh, clean raw milk from a trusted source, clabber is a safe and traditional culture used for generations in cheesemaking.
How long should I age my cheddar cheese?
At least 60 days if you’re using raw milk (as per USDA guidance), though longer aging (3–6 months or more) will develop deeper flavor and a sharper profile.
Can I make cheddar cheese without a cheese press?
A press is highly recommended for cheddar, but if you don’t have one, you can improvise with heavy weights or a DIY setup. Just be sure the pressure is even and consistent.
Do I need to wax or seal the cheese before aging?
Yes. Once the cheese has air-dried and formed a rind, you should wax, vacuum seal, or wrap it in cheese paper to prevent it from drying out or becoming contaminated during aging.
Shop Post

Save Post For Later